top of page

How using AI to cook made my life easier

Easy Croissant-Style Layered Pan Bread — Grated-Butter Pull-Apart Loaf

  • AI Kitchen
  • Sep 29
  • 17 min read

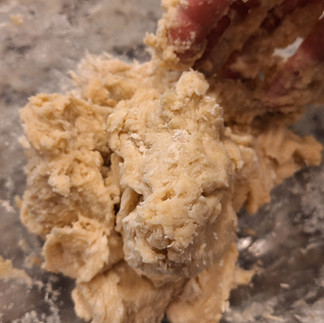
There’s something quietly impressive about bread that pulls apart in buttery ribbons — it looks special, tastes rich, and doesn’t require full croissant-level fuss. This is a shortcut: a croissant-style layered pan loaf made with grated, frozen butter tucked between stacked dough sheets. It gives visible, tear-apart layers and a deep buttery flavor while staying straightforward enough for a weekend bake or a relaxed brunch. Perfect if you want croissant-like appeal without days of folding.

Golden-brown loaf of pull-apart bread on a wooden board, with wheat sprigs nearby. Tag reads "aikitchen.blog". Calm, rustic setting.

💛 Support the Journey - I'm so glad you're here! If you enjoy what I'm doing, support me by clicking the product links in the recipe ingredients and instructions. I earn a small commission (at no extra cost to you). It helps keep this site ad-free! Or, visit the Support me page.

Recipe


Servings: 12 slices

Calories per serving (approx): 213 kcal

Total time (includes active + inactive): 3 hours 30 minutes


Easy Croissant-Style Layered Pan Bread — Grated-Butter Pull-Apart Loaf

Freshly baked braided bread on a wooden board with butter cubes. Gray countertop. Text: aikitchen.blog. Warm, appetizing setting.

Ingredients

  • 3 cups (375 g) all-purpose flour (or bread flour)

  • 2 tablespoons sugar (split: 1 tbsp for yeast activation, 1 tbsp for dough)

  • 1 teaspoon fine salt

  • 2 teaspoons active dry yeast

  • ¾ cup (180 ml) warm milk (105–110°F / 40–43°C)

  • 3 tablespoons unsalted butter, melted (for the dough)

  • 1 large egg, room temperature

  • 6 tablespoons (≈85 g) unsalted butter, frozen solid (for layering) — grate on the large holes of a box grater

  • (optional) extra melted butter for brushing after baking


Instructions

  1. Activate the yeast: Warm the milk to about 105–110°F (warm to the touch). Stir in 1 tablespoon sugar and the active dry yeast. Let sit 5–10 minutes until foamy and fragrant. If no foam forms, start again with fresh yeast.

  2. Make the dough: In a large bowl, whisk together the flour, remaining 1 tablespoon sugar, and salt. Pour in the foamy yeast-milk, melted butter, and egg. Stir until a shaggy dough forms.

  3. Knead: Turn the dough onto a lightly floured surface and knead by hand until smooth and elastic, about 8–10 minutes. The dough should be soft and slightly tacky but not sticky. Place in a lightly oiled bowl, cover, and let rise until doubled, about 1 hour.

  4. Divide & roll: Punch down the dough. Divide into 4 equal pieces. Roll each piece into a rectangle roughly the size of your loaf pan (about the same width and length). Keep the grated butter frozen and the grater chilled if possible.

  5. Grate & stack: Quickly grate the frozen butter over the first dough rectangle in an even layer. Place the second rectangle on top, grate more butter, then the third, more butter, and finally the fourth. Cover the stacked rectangles and refrigerate 20 minutes to firm the butter again.

  6. Roll & shape: On a lightly floured surface, roll the chilled stacked layers into a single large rectangle about ¼-inch (6 mm) thick. Starting from the long side, roll tightly into a log. Trim ends if uneven. Slice the log into 1–1½ inch (2.5–4 cm) wheels.

  7. Arrange & proof: Arrange the wheels snugly, cut-side-up, in a greased standard loaf pan. Cover and let rise until noticeably puffy, about 45–60 minutes.

  8. Bake: Preheat oven to 375°F (190°C). Bake the loaf 30–35 minutes until golden brown and an instant-read thermometer in the center reads about 190°F (88°C). Tent lightly with foil if the top browns too quickly.

  9. Finish: Remove from oven and, if desired, brush the top lightly with melted butter for a soft, glossy crust. Let cool 10–15 minutes before slicing. Serve warm for the best pull-apart layers.


Detailed nutrition per serving (approximate)

(Calculated from typical ingredient values; use a nutrition calculator for precise tracking.)

Per 1 slice (1/12 loaf):

  • Calories: 213 kcal

  • Total fat: 9.8 g

    • Saturated fat: 5.61 g

  • Carbohydrates: 26.7 g

    • Sugars: ~2.94 g

    • Dietary fiber: 0.84 g

  • Protein: 4.34 g

  • Sodium: 194 mg

  • Calcium: ~28 mg (~3% DV)

  • Iron: ~1.33 mg (~7% DV)

Why this matters (health notes):

  • This loaf is a moderate-energy, higher-fat bread (from butter), so it’s great for occasional indulgence and for pairing with protein (eggs, Greek yogurt, tuna) to make more balanced meals.

  • Milk and egg add calcium and protein; the modest protein helps satiety but the slice is not a high-protein food by itself.

  • Saturated fat is relatively high per slice (≈28% of a 20 g saturated-fat DV), so if you’re watching saturated fat intake, enjoy smaller portions or pair a thin slice with lean protein and vegetables.

  • For a lighter version, reduce the layering butter slightly (you’ll lose some layering intensity) or serve smaller portions alongside protein and fiber-rich sides.


Storage & reheating (clear, practical steps)

  • Short-term (room temp): Cool completely. Store in an airtight container or resealable bag at room temperature for up to 48 hours. (Keep away from direct sun/heat.)

  • Refrigeration: For up to 5 days, wrap tightly (plastic wrap or beeswax wrap) and refrigerate to slow spoilage—note refrigeration may slightly dry the crumb.

  • Freezing: Wrap whole loaf or individual slices tightly in foil, then place in a freezer bag. Freeze up to 2 months.

  • Reheating (best for layers): From room-temp or refrigerated: reheat slices in a preheated 350°F (175°C) oven for 6–8 minutes to refresh layers. From frozen: unwrap and reheat frozen slices at 350°F for 12–15 minutes (cover if they brown too quickly). Optionally brush with a little melted butter after reheating.

Prompt

Here's how I used ChatGPT to prompt this "Easy Croissant-Style Layered Pan Bread — Grated-Butter Pull-Apart Loaf" recipe:

I saw this video on Facebook which seemed super easy (don't they all?):

I just saw this super cool video about croissant type bread in a pan- basically make dough, cut in 4, put butter between layers, stack, refrigerate, roll thin, then roll to log, cut wheels, place in bread pan and bake. can you suggest recipe?

ChatGPT sort of said that it knew what I was talking about:

That sounds like a simplified laminated pan bread — basically a mashup of croissant layering and pull-apart loaf. Since it’s not full lamination (like traditional croissants), we can keep the dough softer and more enriched, but still create those buttery layers you saw in the video. Here’s a recipe suggestion that will get you close to that style:

Buttery Layered Pan Bread (Croissant-Style Loaf)

Servings: 1 standard loaf (about 12 slices)Total Time: ~3½ hours (including rising + chilling)Calories per slice: ~210

Ingredients

  • 3 cups (375 g) all-purpose flour (or bread flour for chewier texture)

  • 2 tbsp sugar

  • 1 tsp salt

  • 2 tsp instant yeast

  • ¾ cup (180 ml) warm milk

  • 3 tbsp unsalted butter, melted (for the dough)

  • 1 large egg

  • 6 tbsp cold unsalted butter, sliced thin (for layering)

Method

  1. Make the dough:In a large bowl, mix flour, sugar, salt, and yeast. Add warm milk, melted butter, and egg. Knead until smooth and elastic, about 8–10 minutes by hand or 5 minutes with a mixer. Cover and let rise until doubled, about 1 hour.

  2. Divide and layer:Punch down the dough and divide into 4 equal pieces. Roll each into a rectangle about the size of your pan. Place one layer on parchment, spread with thin slices of cold butter, then top with the second piece of dough. Repeat until all 4 pieces are stacked. Cover and refrigerate for 30 minutes to firm up the butter.

  3. Roll out & shape:On a floured surface, roll the chilled stack into a large rectangle (about ¼-inch thick). Starting from the long side, roll into a log. Slice into 1–1½ inch wheels.

  4. Arrange & proof:Place the cut wheels snugly into a greased loaf pan. Cover and let rise until puffy, 45–60 minutes.

  5. Bake:Preheat oven to 375°F (190°C). Bake 30–35 minutes, until golden brown and the internal temperature hits ~190°F. If it browns too quickly, tent with foil.

  6. Cool slightly before slicing — though it’s best served warm, when the butter layers are soft and aromatic.

Serving Ideas

  • Spread with jam or honey for breakfast.

  • Use as a base for decadent French toast.

  • Serve alongside a soup or salad, letting the buttery layers replace rolls.

Nutrition (per slice, based on 12 slices)

  • Calories: ~210

  • Fat: 9 g

  • Saturated fat: 5 g

  • Carbs: 27 g

  • Protein: 5 g

  • Fiber: 1 g

  • Sugar: 3 g

  • Sodium: 220 mg

Honest Take & Recommendation:This bread is a clever shortcut to buttery, layered texture without the effort of croissant lamination. It’s richer than standard sandwich bread, so it fits better as an occasional treat than a daily staple if you’re watching calories. If your goal is weight loss, you can enjoy it in moderation — maybe plan it as a weekend bake and pair one slice with protein (like eggs or Greek yogurt) instead of buttering more on top. From a burnout-prevention standpoint, this recipe is also fun and low-stress compared to traditional croissants, so it’s a nice project that rewards you with something impressive without days of work.

I saw melted butter. I was sure someone on the internet cracked the croissant process (they haven't):

the video seemed to use melted butter between layers not cold butter

ChatGPT played along:

Ah, that makes sense — melted butter between layers would make it less like a laminated dough (flaky) and more like a rich, soft layered pull-apart loaf. The butter soaks into the dough layers instead of staying separate, giving more tenderness than crispness. Let’s adjust the recipe to match what you saw:

Soft Buttery Layered Pan Bread (Melted Butter Version)

Servings: 1 standard loaf (~12 slices)Total Time: ~3 hoursCalories per slice: ~220

Ingredients

  • 3 cups (375 g) all-purpose flour (or bread flour for chewier bite)

  • 2 tbsp sugar

  • 1 tsp salt

  • 2 tsp instant yeast

  • ¾ cup (180 ml) warm milk

  • 3 tbsp unsalted butter, melted (in dough)

  • 1 large egg

  • 6 tbsp unsalted butter, melted (for layering)

Method

  1. Make the dough:Mix flour, sugar, salt, and yeast in a large bowl. Add warm milk, melted butter (for the dough), and egg. Knead until smooth and elastic, about 8 minutes by hand or 5 minutes with a mixer. Cover and let rise until doubled, about 1 hour.

  2. Divide & stack with melted butter:Punch down the dough and divide into 4 equal pieces. Roll each piece into a rectangle about the size of your loaf pan. Brush the first layer generously with melted butter, place the second layer on top, brush again, and repeat until all 4 layers are stacked. Cover and refrigerate for 20–30 minutes (this makes the stack easier to roll out).

  3. Roll & shape:On a lightly floured surface, roll the stacked dough into a rectangle about ¼-inch thick. Roll it up tightly from the long side into a log. Slice into 1–1½-inch thick wheels.

  4. Arrange in pan & proof:Place the cut pieces snugly into a greased loaf pan. Cover and let rise until puffy, about 45–60 minutes.

  5. Bake:Preheat oven to 350°F (175°C). Bake for 30–35 minutes, until golden and cooked through (internal temp ~190°F). If the top browns too fast, tent with foil halfway.

  6. Cool slightly before slicing — it’s best served warm when the buttery layers pull apart easily.

Serving Ideas

  • Tear off warm layers at the table and dip in olive oil or marinara.

  • Slice thick and toast it — the butter already inside makes it crisp and rich.

  • Use for grilled cheese or breakfast sandwiches for a decadent twist.

Nutrition (per slice, based on 12 slices)

  • Calories: ~220

  • Fat: 10 g

  • Saturated fat: 6 g

  • Carbs: 27 g

  • Protein: 5 g

  • Fiber: 1 g

  • Sugar: 3 g

  • Sodium: 230 mg

I was not convinced:

but will it still have distinct layers similar to croissant in the bread?

ChatGPT was being honest (because I instructed it through memory adjustments heh):

Good question — and here’s the straight answer:

👉 With melted butter, you won’t get distinct croissant-style layers.The reason croissants (or puff pastry) have those visible, peel-apart strata is because cold butter stays in sheets during folding/rolling. In the oven, the water in the butter steams, separating dough layers into flaky pockets.

👉 With melted butter, the fat soaks into the dough instead of staying as a barrier.That gives you a soft, tender crumb with subtle separation, but not the “shattering” layered look. Think pull-apart rolls or buttery brioche-style loaf rather than croissant.

So, if you want:

  • Soft layered bread (easy, forgiving): use melted butter between layers.

  • Defined flaky layers (closer to croissant): use cold butter slices or cold grated butter between layers, refrigerate, then roll.

My honest recommendation: If you loved the video because of the buttery look and pull-apart fun, melted butter is totally fine — you’ll get a gorgeous, rich, layered effect, just not croissant-like flakiness. If you’re actually after that visible, distinct laminated layer, then we should go the cold butter route I first gave you.

Would you like me to give you a hybrid method — still easy, but with grated/chilled butter instead of melted — so you’ll actually see those croissant-like layers in the finished loaf?

I really didn't want to grate butter:

should I use mandolin to slice butter thinly? I could freeze it maybe for easier slicing...?

ChatGPT said sure, but...:

Yes — you’re thinking in exactly the right direction. If you want those distinct croissant-like layers, the butter needs to stay in sheets/pieces between the dough layers, not melt into them.

Here are your best options (from easiest to most effective):

  1. Freeze then slice:

    • Freeze the butter stick for about 15–20 minutes.

    • Use a sharp chef’s knife to slice it as thin as you can.

    • Lay the slices between dough layers.

    • This works fine if you’re patient, but the slices may be uneven.

  2. Mandoline (with caution):

    • A mandoline can work if the butter is very cold but not rock-solid frozen (too hard and it will just shatter).

    • Use a safety guard or cut-resistant glove — frozen butter is slippery and dangerous on a mandoline.

    • Thin, uniform slices will give you neat, even layering.

  3. Grating frozen butter (my favorite hack):

    • Freeze a stick solid.

    • Use a box grater (large holes) to grate directly over each dough layer.

    • It distributes butter evenly and avoids the risk of smashing it flat.

    • This is the closest shortcut to real lamination.

Honest Take & Recommendation:If your goal is croissant-like distinct layers, grated frozen butter is the safest and most effective. A mandoline is doable but risky — you’d have to work fast, and butter is unforgiving on sharp blades. Slicing with a knife after a short freeze is a decent middle ground if you want to keep it simple.

Would you like me to rewrite the recipe step-by-step for the grated frozen butter method so you’ll end up with that flaky, layered loaf instead of just soft pull-apart bread?

I was just not feeling the process:

yes although I am a little concerned grating will create clumps if I am not very good with moving while grating...?

ChatGPT really wanted me to grate:

That’s a fair concern — butter can clump if it warms up or if you grate too slowly. The trick is to keep everything cold and fast. Let me walk you through a foolproof way so you don’t end up with butter blobs instead of even layers:

Tips for Grating Butter Without Clumping

  1. Freeze hard: Put your butter stick in the freezer for at least 1 hour (or overnight).

  2. Chill the grater too: Stick your box grater in the freezer for 10 minutes before grating. Cold metal = less sticking.

  3. Work in halves: Grate half the butter, sprinkle evenly across the dough, then pop everything back in the fridge for 5 minutes before continuing. This prevents clumping/melting in your hands.

  4. Light hand toss: After sprinkling the grated butter on, gently spread it with your fingertips so it’s evenly distributed, instead of letting little piles build up.

Updated Recipe Step (for layering with grated butter)

  • After dividing dough into 4 pieces and rolling them into rectangles, sprinkle a thin, even layer of grated frozen butter over the first piece.

  • Top with the second dough piece, sprinkle with more grated butter, and repeat.

  • Refrigerate the stacked dough 20 minutes before rolling it out into a big rectangle.

  • Roll, slice, shape, and bake as before.

👉 This method will give you the closest thing to visible laminated layers without doing full croissant lamination (folds and turns). You’ll notice a soft but slightly flaky pull, almost like a hybrid between brioche and croissant.

My honest take:If your kitchen is warm or you work slowly, grated butter can get messy — in that case, slicing thin (after freezing) may actually be easier for you. You’ll get bigger butter sheets, but they’ll still create separation. If you want the most forgiving method with the least stress, I’d say freeze the stick, slice thin with a sharp knife, and layer — it’s not perfect lamination, but much harder to mess up.

Do you want me to write out two clear versions of the recipe (grated vs sliced butter) so you can decide on baking day depending on your mood/comfort level?

So I finally agreed:

no let's do the version with grating. I will freeze my butter

ChatGPT adjusted recipe (and seemed relieved):

Perfect 👌 — frozen butter + grating is going to give you the best chance at those croissant-like layers without the full croissant workload. I’ll lay this out clearly so you can follow it step by step without worrying about clumping or missing a detail.

Croissant-Style Layered Pan Bread (Grated Butter Version)

Servings: 1 standard loaf (~12 slices)Total Time: ~3½ hours (including rises and chilling)Calories per slice: ~225

Ingredients

  • 3 cups (375 g) all-purpose flour (or bread flour for chewier texture)

  • 2 tbsp sugar

  • 1 tsp salt

  • 2 tsp instant yeast

  • ¾ cup (180 ml) warm milk

  • 3 tbsp unsalted butter, melted (for the dough)

  • 1 large egg

  • 6 tbsp (85 g) unsalted butter, frozen solid (for layering)

Method

  1. Make the dough:In a large bowl, combine flour, sugar, salt, and yeast. Add warm milk, melted butter, and egg. Knead until smooth and elastic, 8–10 minutes by hand or 5 minutes with a mixer. Cover and let rise until doubled, about 1 hour.

  2. Divide and prepare for layering:Punch down dough and divide into 4 equal pieces. Roll each piece into a rectangle roughly the size of your loaf pan.

  3. Grate butter for layering:

    • Remove the frozen butter from the freezer.

    • Grate on the large holes of a box grater (chill the grater if possible).

    • Quickly scatter the grated butter evenly over the first dough rectangle.

    • Place the second rectangle on top, repeat with butter, and continue until all 4 layers are stacked.

    • Cover and refrigerate the stacked dough for 20 minutes so the butter firms up again.

  4. Roll and shape:On a lightly floured surface, roll the chilled stack into a large rectangle about ¼-inch thick. Starting from the long side, roll it into a tight log. Slice into 1–1½-inch thick wheels.

  5. Arrange and proof:Place the cut wheels snugly into a greased loaf pan. Cover and let rise until puffy, 45–60 minutes.

  6. Bake:Preheat oven to 375°F (190°C). Bake for 30–35 minutes until golden brown and the center registers about 190°F. If browning too quickly, tent loosely with foil.

  7. Cool slightly before slicing, but it’s best enjoyed warm when the layers pull apart.

Serving Ideas

  • Pull layers apart at the table with dinner, instead of rolls.

  • Toast slices and top with fruit jam for breakfast.

  • Use for a “fancy grilled cheese” — the buttery layers crisp beautifully.

Nutrition (per slice, based on 12 slices)

  • Calories: ~225

  • Fat: 10 g

  • Saturated Fat: 6 g

  • Carbs: 28 g

  • Protein: 6 g

  • Fiber: 1 g

  • Sugar: 3 g

  • Sodium: 230 mg

Honest Take & Recommendation:This version should give you those visible, layered pulls when you tear it open — not quite shatteringly flaky like croissants, but way more defined than if you used melted butter. The key is working cold and quick with the grated butter. For weight-loss goals, this is a once-in-a-while bread; it’s higher in fat and calories than sandwich bread, but worth it as a weekend bake or share-loaf. From a burnout perspective, this is a fun “project bread” — it feels impressive, but the steps are straightforward and forgiving compared to croissants, so you’ll come away satisfied, not drained.

Do you want me to also give you storage and reheating instructions (to keep the layers fresh and crisp), or are you planning to serve the whole loaf the day you bake it?

I will always prefer yeast activation:

Last tweak, can you please do this with yeast activation? I do not like when there are distinct yeast crumbs in the bread and I am hand kneading

ChatGPT updated:

Got it 👍 — if you’re hand-kneading and want to avoid any chance of yeast specks, activating the yeast first is the way to go. That way it’s fully dissolved and bubbly before mixing into the flour. I’ll rewrite the method with yeast activation built in:

Croissant-Style Layered Pan Bread (Grated Butter + Activated Yeast)

Servings: 1 standard loaf (~12 slices)Total Time: ~3½ hours (including rises and chilling)Calories per slice: ~225

Ingredients

  • 3 cups (375 g) all-purpose flour (or bread flour for chewier texture)

  • 2 tbsp sugar (divided: 1 tbsp for yeast, 1 tbsp for flour mix)

  • 1 tsp salt

  • 2 tsp active dry yeast (not instant)

  • ¾ cup (180 ml) warm milk (105–110°F / 40–43°C)

  • 3 tbsp unsalted butter, melted (for the dough)

  • 1 large egg, at room temperature

  • 6 tbsp (85 g) unsalted butter, frozen solid (for layering)

Method

  1. Activate the yeast:Warm the milk until just above body temperature (not hot). Stir in the yeast and 1 tbsp sugar. Let sit 5–10 minutes until foamy and bubbly. If no foam appears, the yeast may be dead — start over with fresh yeast.

  2. Mix the dough:In a large bowl, combine flour, remaining 1 tbsp sugar, and salt. Pour in the activated yeast mixture, melted butter, and egg. Mix until a rough dough forms.

  3. Knead:Turn out onto a lightly floured surface and knead by hand until smooth and elastic, about 10 minutes. The dough should feel soft but not sticky. (Add a sprinkle of flour if too wet, or a drizzle of milk if too dry.) Cover and let rise until doubled, about 1 hour.

  4. Divide and prepare for layering:Punch down the dough and divide into 4 equal pieces. Roll each into a rectangle roughly the size of your loaf pan.

  5. Grate butter for layering:

    • Remove frozen butter from the freezer.

    • Grate on the large holes of a chilled box grater.

    • Sprinkle evenly over the first dough rectangle.

    • Top with the second piece of dough, repeat, and continue until all 4 layers are stacked.

    • Cover and refrigerate for 20 minutes so the butter firms back up.

  6. Roll and shape:On a lightly floured surface, roll the chilled stack into a large rectangle about ¼-inch thick. Roll up tightly from the long side into a log. Slice into 1–1½-inch thick wheels.

  7. Arrange and proof:Place the wheels snugly into a greased loaf pan. Cover and let rise until puffy, 45–60 minutes.

  8. Bake:Preheat oven to 375°F (190°C). Bake 30–35 minutes, until golden and the center reads ~190°F. Tent with foil if the top browns too quickly.

  9. Cool slightly before slicing, but serve warm for best layered effect.

Serving Ideas

  • Serve warm as a pull-apart loaf for dinner.

  • Toast slices for a quick buttery breakfast.

  • Use in savory sandwiches — the layers toast beautifully.

Nutrition (per slice, based on 12 slices)

  • Calories: ~225

  • Fat: 10 g

  • Saturated Fat: 6 g

  • Carbs: 28 g

  • Protein: 6 g

  • Fiber: 1 g

  • Sugar: 3 g

  • Sodium: 230 mg

I then had some adjustments because I used a toaster oven (regular oven was occupied by my husband's cooking):

Am I supposed to brush with butter after baking? I was baking in toaster oven so it was browning fast and I tented with foil but it did catch some extra brown before I noticed 

ChatGPT advised on the oven:

Ah, yes — that’s a common situation with toaster ovens, which can brown the tops faster than conventional ovens. Here’s how it works for this type of layered bread:

Brushing with Butter

  • Optional, but flavorful: Brushing the loaf right after baking with melted butter gives a shiny, soft crust and enhances the buttery flavor. It doesn’t affect the layering inside, it just makes the exterior rich and tender.

  • Timing: Brush immediately when the loaf comes out of the oven while it’s still hot. The butter will soak into the top layer slightly and give a lovely sheen.

  • Skipping it: If you’re trying to limit extra fat, it’s fine to leave it unbrushed — the loaf will still be tender and buttery inside.

Toaster Oven Tips

  1. Tent early: If your loaf is browning too quickly, covering loosely with foil earlier in the bake prevents the crust from over-browning.

  2. Lower temperature: If your toaster oven runs hot, try baking 10–15°F lower than the recipe and extend the bake slightly — this gives the interior more time to fully cook without burning the top.

  3. Position: Place the loaf on a lower rack if the top is browning too fast, or one notch below the center of your toaster oven.

  4. Check early: Unlike conventional ovens, toaster ovens have uneven heating, so start checking 5–10 minutes before the recipe’s stated time.

Honest Take:

It’s normal for toaster ovens to brown the top extra fast. The fact it caught a little extra brown isn’t a problem — it can even taste a bit more caramelized and nutty. Brushing with butter afterward would soften the crust and add flavor. For your loaf, a light brushing would offset any slight dryness from the fast browning.

If you want, I can give a small “toaster-oven tweak” version of the recipe that balances browning with soft layered crumb so you can get perfect results next time. This will include temp, rack placement, and foil timing. Do you want me to do that?

I gave some specs:

It's a Cuisinart with turbo option so hopefully better distribution but it is smallish. I lowered temp to 250

ChatGPT understood:

Ah, that explains a lot — the turbo/convection option will circulate hot air and brown the top faster, especially in a smaller chamber. Lowering the temp to 250°F (about 120°C) is a smart move: it slows down the crust browning and gives the interior more time to bake through.

Here’s how to optimize for your Cuisinart toaster oven:

Toaster Oven Layered Bread Tips

  1. Use convection/turbo: This helps distribute heat evenly, but it also accelerates browning. Keep an eye on the top.

  2. Lower temp & longer bake: 250–275°F with 35–45 minutes bake time should allow the loaf to cook through without over-browning.

  3. Tent with foil early: As soon as you see the top reaching golden brown, lightly tent with foil. Since your oven is small, check it every 5–7 minutes after that.

  4. Rack position: Keep the loaf on the middle or slightly lower rack to reduce top heat intensity.

  5. Butter brushing: After baking, brush lightly with melted butter — this will soften any overly crisp spots from the turbo airflow.

Honest Take:

With turbo convection in a small toaster oven, small tweaks in temp and foil timing make a huge difference. 250°F is a good choice; just expect the bake to take longer than the standard recipe. Brushing with butter afterward is a nice finishing touch that can rescue a slightly darker top.

If you want, I can adjust the full recipe with precise toaster oven settings so you can follow it next time and hit the perfect golden layers without over-browning. Do you want me to do that?

Scroll to the top or click below for the final recipe.

Comments

Comments

Rated 0 out of 5 stars.
No ratings yet

Add a rating

Don't Miss Out

Sign Up and Get All My Recipes

Thanks for submitting!

bottom of page