top of page

How using AI to cook made my life easier

Chocolate Chip Sourdough Sandwich Bread: A Tangy, Chocolatey Loaf for Everyday Baking

  • AI Kitchen
  • 7 hours ago
  • 10 min read

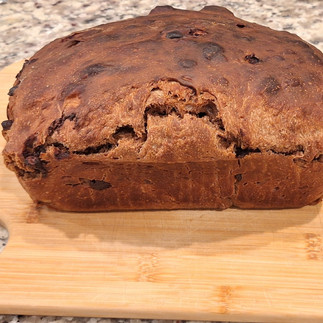
This chocolate chip sourdough sandwich bread is your new go-to for a cozy, homemade loaf that’s as easy as it is delicious. With a hint of cocoa, bursts of melty chocolate, and the gut-friendly tang of sourdough, it’s perfect for breakfast toast, lunchbox sandwiches, or a sweet snack. Designed for busy bakers who love simple recipes with artisan flair, this loaf brings together rich flavors and minimal effort—ideal for back-to-school season or weekend baking sessions.

Chocolate bread loaf and slice on a bamboo board, dark and light brown tones. "aikitchen.blog" text label visible. Gray background.

💛 Support the Journey - I'm so glad you're here! If you enjoy what I'm doing, support me by clicking the product links in the recipe ingredients and instructions. I earn a small commission (at no extra cost to you). It helps keep this site ad-free! Or, visit the Support me page.

Recipe


Number of servings: 12 slices

Calories per serving: 228

Total time: 10 hours (including 8 hours fermentation; active time about 30 minutes)


Chocolate Chip Sourdough Sandwich Bread: A Tangy, Chocolatey Loaf for Everyday Baking

Chocolate bread loaf and slice on a bamboo board, dark and light brown tones. "aikitchen.blog" text label visible. Gray background.

Ingredients

  • 500 grams bread flour

  • 2 tablespoons melted butter (for a tender, rich crumb)

  • 1 cup milk (whole or your choice for extra creaminess)

  • 1/2 cup boiling water (to temper the milk to lukewarm)

  • 1 cup active sourdough starter (bubbly and ready for fermentation)

  • 2 teaspoons white sugar (for a touch of sweetness)

  • 2 tablespoons unsweetened cocoa powder (for deep chocolate flavor)

  • 2 teaspoons salt (added later for structure)

  • 1/3 cup chocolate chips (semi-sweet or dark for melty pockets)


Instructions

  1. In a large bowl, mix the milk and boiling water to create a lukewarm liquid—this helps activate the starter without overheating it.

  2. Stir in the sugar, melted butter, cocoa powder, and active sourdough starter until fully combined, forming a smooth base.

  3. Add the bread flour and mix until a shaggy dough forms—no heavy kneading needed, keeping it simple for home bakers.

  4. Cover and let the dough rest for 30 minutes at room temperature to hydrate fully.

  5. Sprinkle in the salt and knead lightly for 2–3 minutes until incorporated, building just enough structure.

  6. Over the next 2 hours, perform 4–5 stretch-and-folds every 30 minutes: gently pull one side of the dough up and fold it over the center, rotating the bowl each time for a light, airy texture.

  7. After the final fold, gently flatten the dough and fold in the chocolate chips, working lightly to keep them evenly distributed without deflating the dough.

  8. Shape the dough into a loaf and place it in a greased bread pan for bulk fermentation. Cover and let rise at room temperature for 6–8 hours, or refrigerate overnight for deeper flavor.

  9. Preheat your oven to 375°F when the dough is puffy and nearly doubled.

  10. Bake for 35–45 minutes until golden and the internal temperature reaches 190–200°F. Tent with foil if the top browns too quickly.

  11. Cool in the pan for 10 minutes, then transfer to a wire rack to cool completely before slicing for the best texture.


Nutritional value per serving (1 slice): Calories 228, Total Fat 8g (Saturated Fat 4g, Trans Fat 0g), Cholesterol 10mg, Sodium 200mg, Total Carbohydrates 35g (Dietary Fiber 2g, Sugars 10g), Protein 5g, Vitamin D 2% DV, Calcium 4% DV, Iron 10% DV, Potassium 4% DV. The fermented sourdough supports gut health, while cocoa adds antioxidants—consult a nutritionist for personalized dietary needs.


Storage instructions: Store slices in an airtight container at room temperature for 3–5 days to keep them soft and fresh—perfect for quick meals. For longer storage, wrap tightly in plastic and freeze for up to 3 months; thaw at room temperature or toast directly from frozen for a warm, crispy treat. Avoid refrigerating to prevent drying out.

Consider the following products for the ultimate baking experience (click to go to the Amazon page):

Bread baking kit with bannetons, dough scraper, scoring tools, measuring mat, brush, and storage bag on a white surface, labeled "Panny."
Red bread lame with a blade, against a yellow and black NeoRov box. Includes text: "Extractable Magnetic Bread Lame Pro" and razor blades.
Disposable bread proofing baskets, liners, and covers. White fabric with visible texture. Hands placing liner over basket. Plastic packaging.

Prompt

Here's how I used Grok to prompt this "Chocolate Chip Sourdough Sandwich Bread: A Tangy, Chocolatey Loaf for Everyday Baking" recipe:

I already had a recipe. I wanted to upgrade it or try to alter it a bit:

I want to talk to you about an idea that I have. I really appreciate honesty, if this will work or not. It's a crazy thought I have. 
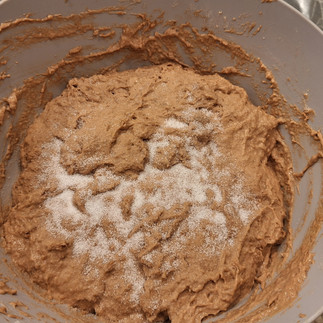
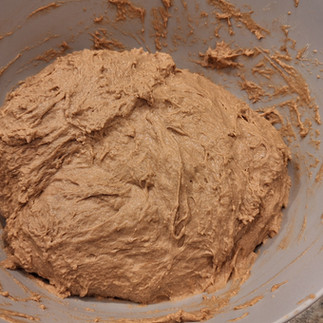
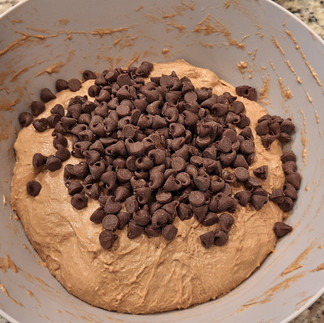
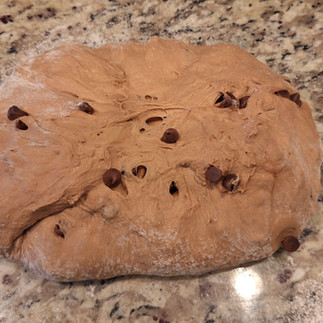
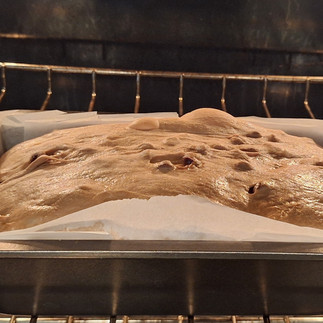
I have started making an interesting sourdough bread- 500 grams bread flour, 1/8 cup melted butter, 1 cup milk, 1/2 cup boiling water (so that the milk becomes lukewarm), 1 cup active sourdough starter. 2 tsp white sugar. 2 tbsp cocoa powder. Mix wet + sugar, mix into flour, knead, wait 30 mins, add 2 tsp salt. stretch and fold. I am now at 4th stretch and fold. I was going to add about 1/3 cup chocolate chips and continue to bulk fermentation in a bread pan as an upgraded sandwich bread, but now I am having thoughts, could I, instead of chocolate chips, grate cold butter, knead lightly to incorporate (aka fold), then perform a series of biscuit folds, and bake biscuits instead? Sourdough cocoa biscuits? Which one would be more unique, would work, and would be totally awesome for my cooking blog?

Grok broke down in great detail:

First off, I love that you're experimenting with sourdough—it's one of the most rewarding (and forgiving) ways to bake, even when ideas get a bit wild. Your base recipe sounds solid: a moderately hydrated cocoa-infused dough (around 70% hydration, give or take, based on the ingredients) that's already building good structure through those stretch-and-folds. The cocoa adds a subtle bitterness that pairs nicely with the tang of the starter, and the melted butter early on gives it richness without overpowering things.

Now, let's break down your two paths honestly: the original chocolate chip sandwich bread vs. pivoting to grated butter and biscuit-style lamination for sourdough cocoa biscuits. I'll evaluate based on feasibility (will it work?), uniqueness, and blog potential, drawing from how similar recipes typically behave.

Feasibility: Which One Will Work?

  • Chocolate Chip Sandwich Bread: This is the safer bet and should work great with minimal risk. You've got a bread dough that's already developing gluten and fermenting nicely. Adding 1/3 cup chocolate chips during the next fold (or right before shaping) will incorporate them without deflating the dough much—just pat them in gently to avoid tearing. Bulk ferment in the pan as planned, then proof and bake (I'd aim for 375–400°F for 35–45 minutes, tenting if it browns too fast). The result? A soft, sliceable loaf with melty chocolate pockets, like a tangy chocolate babka meets sandwich bread. The cocoa will make it deeply chocolatey without being overly sweet, and the starter's acidity cuts through the richness. Potential issues: If your starter isn't super active, it might not rise as high, but that's fixable with a longer proof. Overall, high success rate—I've seen plenty of similar recipes turn out well.

  • Sourdough Cocoa Biscuits with Laminated Butter: This is the crazier idea, and honestly, it might not work as seamlessly as traditional biscuits, but it could surprise you if you're okay with experimentation. At this stage (post-knead and mid-stretch-and-fold), your dough is warmish, sticky, and has developed gluten—ideal for bread but the opposite of what biscuits want. Biscuits thrive on minimal handling, cold ingredients, and low gluten development for tenderness and flakiness. Grating cold butter (say, 1/4–1/2 cup to match your "biscuit folds" vibe) and folding it in lightly could add layers, mimicking lamination like in croissants or flaky biscuits. Then, do 3–4 tri-folds (roll out gently to avoid melting the butter, fold into thirds, rotate, repeat), chill if needed, cut into rounds/squares, and bake hot (425–450°F for 12–15 minutes) for steam-driven rise.

    But here's the honesty: Without a chemical leavener like baking powder (2–3 tsp mixed in before folding), it might not puff up much—sourdough alone relies on fermentation for lift, and biscuits are meant to be quick. Your dough's existing melted butter and hydration could make it too slack to hold clean layers, leading to denser, chewier results rather than light and flaky. If the butter melts during handling, you'll lose that lamination effect. It might end up more like a hybrid sourdough roll or scone than a true biscuit. That said, if you add a bit of baking powder and keep everything cold, it could work decently as a unique, tangy chocolate "biscuit" with some flake. Lower success rate overall, but not impossible—think 60/40 odds if you tweak it.

Uniqueness: Which Stands Out More?

  • The sandwich bread is fun and upgraded (cocoa + chips in a sourdough loaf isn't super common but exists in variations like double-chocolate sourdough breads). It's approachable and versatile for sandwiches (peanut butter? Nutella? Yes please).

  • The biscuits win on uniqueness hands-down. Sourdough biscuits are a thing (often with discard for quick bakes), and lamination with grated butter is standard for extra flakiness, but cocoa-infused versions? I couldn't find any direct matches—most "chocolate sourdough biscuits" searches pull up cookies instead. It'd be like chocolate scones meets tangy biscuits, potentially awesome for dipping in coffee or topping with whipped cream. If it flops texture-wise, it could still taste great as a flatbread-style thing.

Blog Potential: Which Would Be Totally Awesome?

For a cooking blog, the biscuits edge it out for "awesome" factor because they're riskier and more story-worthy. Document the pivot: Share the "what if?" moment, the process (photos of grating butter, folding, before/after bake), and the honest outcome—even if it's not perfect, readers love experiments that feel real and innovative. It could go viral as a "sourdough hack" or "chocolate breakfast biscuit" idea, especially if you frame it as an upgrade on boring biscuits. Pair it with serving suggestions like strawberry jam or chili for a sweet-savory twist.

That said, if you want a win to build confidence, go bread—it's reliable, photogenic (those chocolate streaks!), and easier to riff on for future posts (e.g., add nuts or swirl in cinnamon). Either way, both align with your blog if it's about creative home baking.

My vote? Try the biscuits if you're feeling adventurous and have time to troubleshoot (add that baking powder!). If not, stick with the bread—it's less likely to disappoint. Whichever you choose, update me on how it turns out; I'd love to hear!

I was sorta convinced to go with bread but I also wanted it to be extra rich:

I think bread it is. For the bread, would it be nicer if I do grate in butter (or incorporate pea size clumps) during the shaping phase or will it just be redundant?

Grok suggested:

Sticking with the bread is a solid choice—it's going to be a crowd-pleaser with that cocoa tang and chocolate chip pops. Now, about your idea to grate in butter (or incorporate pea-sized clumps) during the shaping phase: let’s break it down to see if it’s worth it or redundant, keeping it honest and practical for your blog-worthy loaf.

Will Grating Butter or Adding Pea-Sized Clumps Help?

Your current dough already has 1/8 cup (2 tablespoons) of melted butter mixed in early, which contributes to a tender, rich crumb—think brioche-like softness but with sourdough’s chew. Adding more butter during shaping could enhance flakiness or create buttery pockets, but there are a few things to consider:

  • Texture Impact: Grating cold butter or adding pea-sized clumps and folding them in during shaping mimics a laminated dough (like croissants or puff pastry). This could create subtle layers or pockets of richness in the baked loaf, especially if the butter stays cold and doesn’t fully incorporate. However, since your dough is already moderately hydrated (around 70% hydration from the milk, water, and starter) and has developed gluten through kneading and stretch-and-folds, it’s geared for a cohesive, springy crumb rather than a flaky one. The extra butter might not create distinct layers as it would in a low-gluten, low-hydration dough (like biscuit dough). Instead, it could make the crumb slightly denser or greasier if the butter melts into the dough during handling or baking.

  • Flavor Impact: More butter would amplify richness, which could complement the cocoa and chocolate chips nicely, making the bread feel more indulgent—like a dessert loaf. However, with 2 tablespoons already in the mix, plus the milk’s fat and the chocolate chips’ cocoa butter, you’re not short on richness. Adding, say, another 2–4 tablespoons of butter (grated or in clumps) might tip it toward overly heavy, especially for a sandwich bread meant to be versatile.

  • Workability: Grating butter or adding clumps during shaping is tricky with a fermented, slightly sticky dough. If the butter melts (easy at room temp or with warm hands), it’ll blend into the dough, negating the layering effect and potentially making it harder to shape neatly. You’d need to work fast, keep the butter cold, and maybe chill the dough briefly before shaping to maintain distinct butter bits. This adds complexity to an otherwise straightforward process.

  • Redundancy Check: The melted butter already in the dough is doing its job for tenderness and flavor. The chocolate chips will add bursts of fat and sweetness, creating contrast in each slice. Extra butter might not add enough unique texture or flavor to justify the effort, especially since the dough isn’t structured for lamination (low hydration and minimal gluten development are better for that). It risks being redundant unless you’re aiming for a super-rich, almost pastry-like bread.

Would It Be Nicer?

  • If You Add Butter: It could make the bread feel more decadent, with potential for slight flakiness or buttery streaks if executed well (think laminated brioche). It’d stand out for your blog as a “luxury” twist on sourdough sandwich bread—great for storytelling if you document the process. Best case: you get a richer loaf with subtle buttery pockets that pair beautifully with the chocolate. Worst case: the butter melts in, making the crumb denser or uneven, but it’ll still taste good.

  • If You Skip It: You’ll get a reliable, soft, tangy loaf with cocoa depth and melty chocolate chips—already a winner for sandwiches or toast. It’s simpler, less risky, and still unique enough for your blog, especially with creative serving ideas (e.g., toasted with almond butter or grilled with cheese).

Recommendation

I’d lean toward skipping the extra butter for simplicity and to avoid redundancy. Your dough’s existing fat content (from melted butter, milk, and soon-to-be-added chocolate chips) is plenty for a rich, tender loaf. Adding more butter at this stage might not elevate the texture enough to justify the extra effort, especially since the dough’s gluten structure and hydration aren’t optimized for lamination. It could also make shaping messier, and you’re already in a good spot with a well-fermented dough.

If you really want to experiment for blog flair, try adding 2 tablespoons of grated butter (keep it frozen until use) during shaping, but do it lightly: flatten the dough gently, sprinkle the butter evenly, fold a couple of times, then shape immediately. Chill the shaped loaf for 15–20 minutes before proofing to keep the butter solid. This could give a slight layered effect without overcomplicating things. But honestly, the chocolate chips alone will steal the show, and the cocoa-sourdough combo is unique enough to wow your readers.

Practical Next Steps

  • Add the 1/3 cup chocolate chips at the next stretch-and-fold or right before shaping. Pat them in gently to avoid deflating the dough.

  • Finish bulk fermentation until the dough is puffy and jiggly (likely 6–12 hours total, depending on your starter and room temp).

  • Shape for your bread pan, proof until it’s risen about 30–50% (1–3 hours), and bake at 375–400°F for 35–45 minutes, checking for an internal temp of 190–200°F.

  • For your blog, take photos of the chip incorporation, the shaped loaf, and the final slice to show off those chocolate pockets.

Let me know how it turns out or if you want tips for styling it for your blog! You’ve got a killer recipe here.

Lastly, I asked for a full recipe rewrite. Scroll to the top or click below for the final recipe.

Comments

Comments

Rated 0 out of 5 stars.
No ratings yet

Add a rating

Don't Miss Out

Sign Up and Get All My Recipes

Thanks for submitting!

bottom of page